How to Repair Fusion Drive on Mac?
Summary: This blog shares a few methods to repair your fusion drive on Mac running on macOS Ventura, Monterey, Big Sur, Catalina or earlier. And how you can recover data from such drive.
Download free-to-try bootable data recovery tool to retrieve fusion drive data.

Note: Create Recovery Drive feature is only available in Stellar Data Recovery Version 10 & earlier! The latest version has eliminated the need of any other Mac or external device. User can directly use Stellar Data Recovery through an activated link.
Table of Content
1. Recover Data from a Corrupt Fusion Drive2. Repair Fusion Drive by Using Disk Utility
3. Restore Fusion Drive Data by Using Time Machine
Some Mac models have Fusion Drives that use both solid-state drives and hard drives to provide the benefits of both the drive technology. Solid-state drive with low storage capacity is helpful to store macOS and boot your Mac quickly. While hard drive with ample storage is useful to save voluminous data.
Fusion drives do fail due to aging, physical damage, or logical issues. In case your fusion drive is inaccessible due to logical problems that result in the non-booting of your Mac, then begin with the next method to recover your inaccessible data from Mac.
1. Recover Data from a Corrupt Fusion Drive
When your Mac doesn’t boot, perform the following steps to recover data from the fusion drive:
Step 1. Download and install the *trial version of Stellar Data Recovery Professional on a working Mac. Launch the software, activate it, and create a recovery drive. Watch Video.
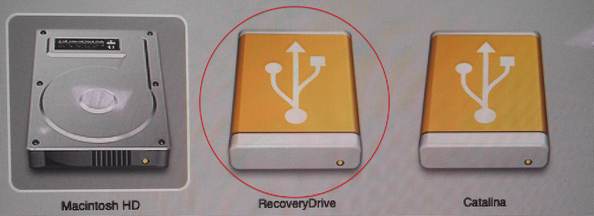
Step 2. Connect the bootable USB recovery drive on your affected Mac, power on the Mac, and press-hold the Option key. Select the USB drive to boot from it.

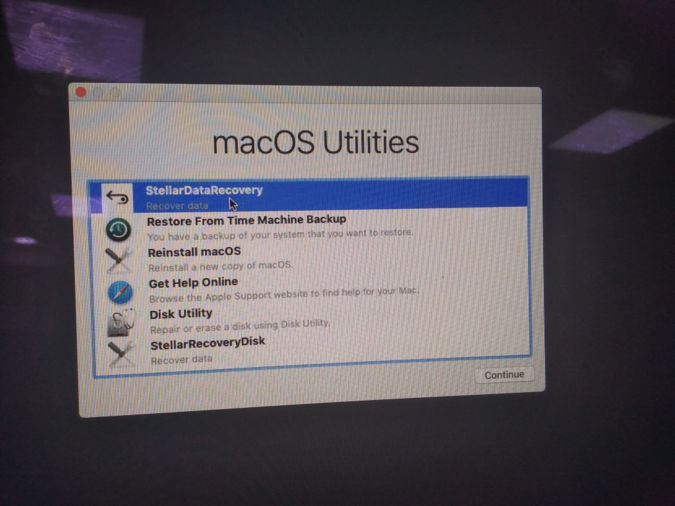
Step 3. On the macOS Utilities window, select Stellar Data Recovery then click Continue to launch the Mac data recovery software.

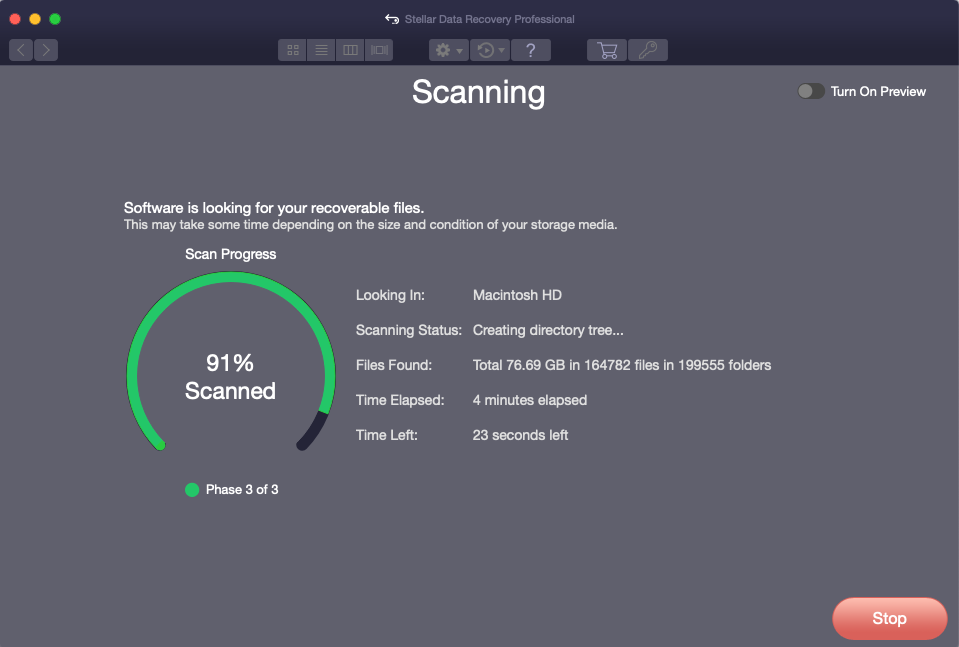
Step 4. Use the software to select the type of data and the fusion drive location. Toggle on Deep Scan, then click Scan.

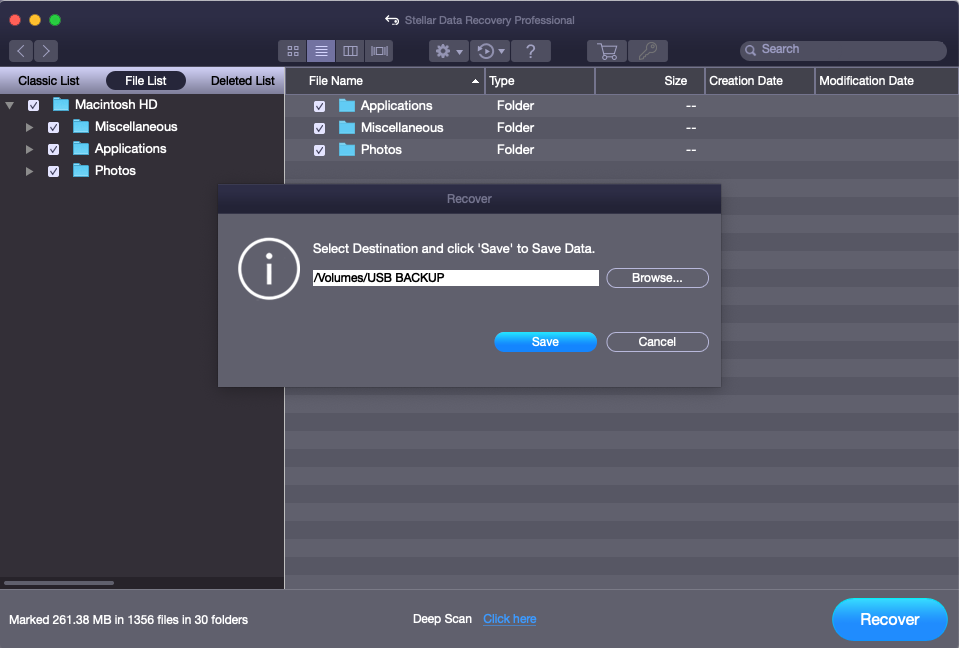
Step 5. Select all the essential files then click Recover. Save it to an external hard drive. Check the recovered fusion drive data from the external storage device.

Step 6. Once you’ve recovered the data, use the macOS Utilities window to repair the drive using First Aid. The next section explains the method.
The trial version of Stellar Data Recovery Professional for Mac lets you free scan and preview, but you need to activate the software to recover your files. The software comes with a 30 days money-back guarantee for your benefit.
2. Repair Fusion Drive by Using Disk Utility
It may be possible that your Mac fusion drive is corrupt. So, you can try to fix the drive by using the First Aid functionality of Disk Utility. Steps are as follows:
- Start your Mac, then immediately press and hold Command + R keys. Release the keys when the Apple logo appears. Mac boots into macOS Recovery mode.
- From the macOS Utilities window, select Disk Utility, then click Continue.
- From the left pane of Disk Utility, select the fusion drive. From the top pane, click on the First Aid tab.
- Click the Run button to repair the fusion drive. When the repair is successful, restore the recovered data to the Mac.
- In case First Aid can’t repair the fusion drive, reinstall macOS by using the macOS Utilities window. Restore the recovered data to the Mac.
3. Restore Fusion Drive Data by Using Time Machine
When you’ve backed up your Mac by using Time Machine, you can use the backup drive to restore your lost or deleted data from the First Aid repaired fusion drive. Steps are as follows:
- Make sure your Time Machine backup drive is connected to your Mac.
- Boot your Mac into macOS Recovery mode. From the macOS Utilities window, select Restore From Time Machine Backup, then click Continue.
- Do as per the on-screen instructions to restore your data to your Mac fusion drive by using the Time Machine backup drive.
Conclusion
When your Mac doesn’t boot due to fusion drive failure, retrieve data present on the inaccessible drive using a bootable Mac data recovery software. Once you’ve recovered the data, try to repair the drive by using First Aid of Disk Utility. If the repair fails, reinstall macOS, then restore data from the recovered drive. Alternatively, if you had backed up your Mac before the fusion drive failed, you can use the Time Machine backup drive to restore your data to the Mac.


